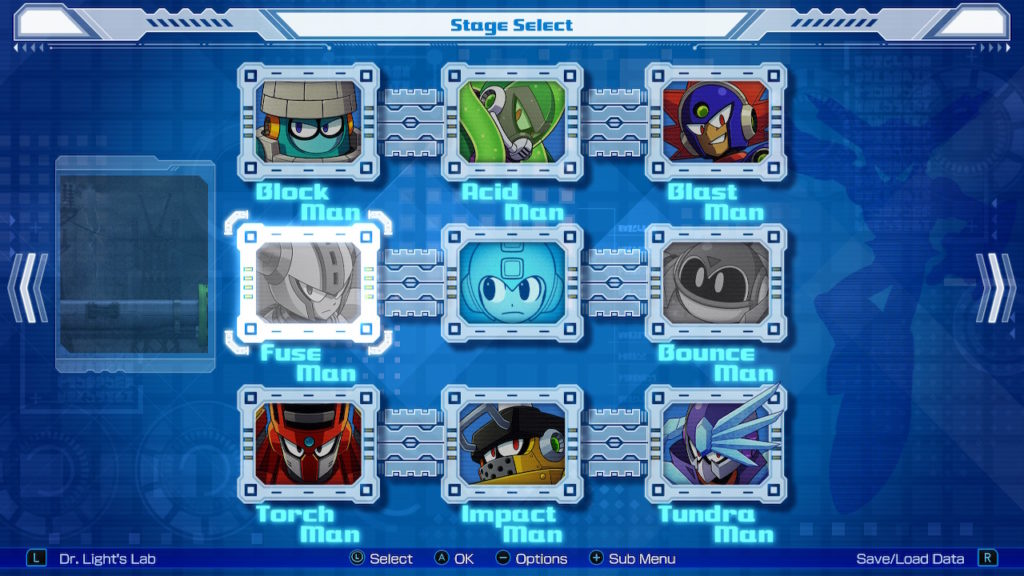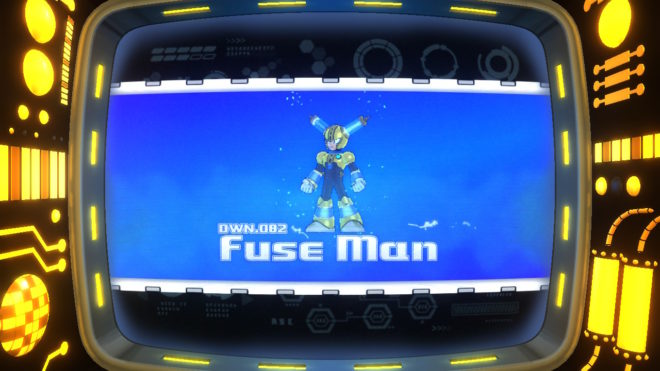
Welcome back to our in-depth look at the level design of Mega Man 11! Last time, we bounded through Bounce Man’s stage and picked up the Bounce Ball weapon, and this time we’ll make good use of it in Fuse Man’s stage! If you missed the last post—or if you’re reading this later and want to read in your own order—feel free to click the link in the stage select table below!
 |
 |
 |
 |
 |
 |
 |
 |
 |
As with before, I’ve included both versions of the stage music for ambience. In contrast to Bounce Man’s music, which kept up the theme in much the same way, the two stage themes for Fuse Man emphasize very different aspects of the environment. Fuse Man’s stage is a power plant in an oncoming thunderstorm, a dramatic setting for a battle. The original, electronic theme is high-energy, with a quick tempo fitting for a crackling power plant, while the instrumental theme is a slower burn building from calm to the quiet intensity of the imminent storm. While each version supports the stage in its own way, they both contribute to its powerful, foreboding atmosphere.


The stage opens with its only outdoor room. Lightning crackles across the clouds in the background matched by arcs around the power lines closer to the foreground. This first room is a lengthy corridor into the power plant itself with a couple of basic competency tests built in. Before they can walk too far to the right, the player encounters a ledge they must jump over, immediately followed by the first of many Electriris—small, floating enemies surrounded by a circular field of electricity.
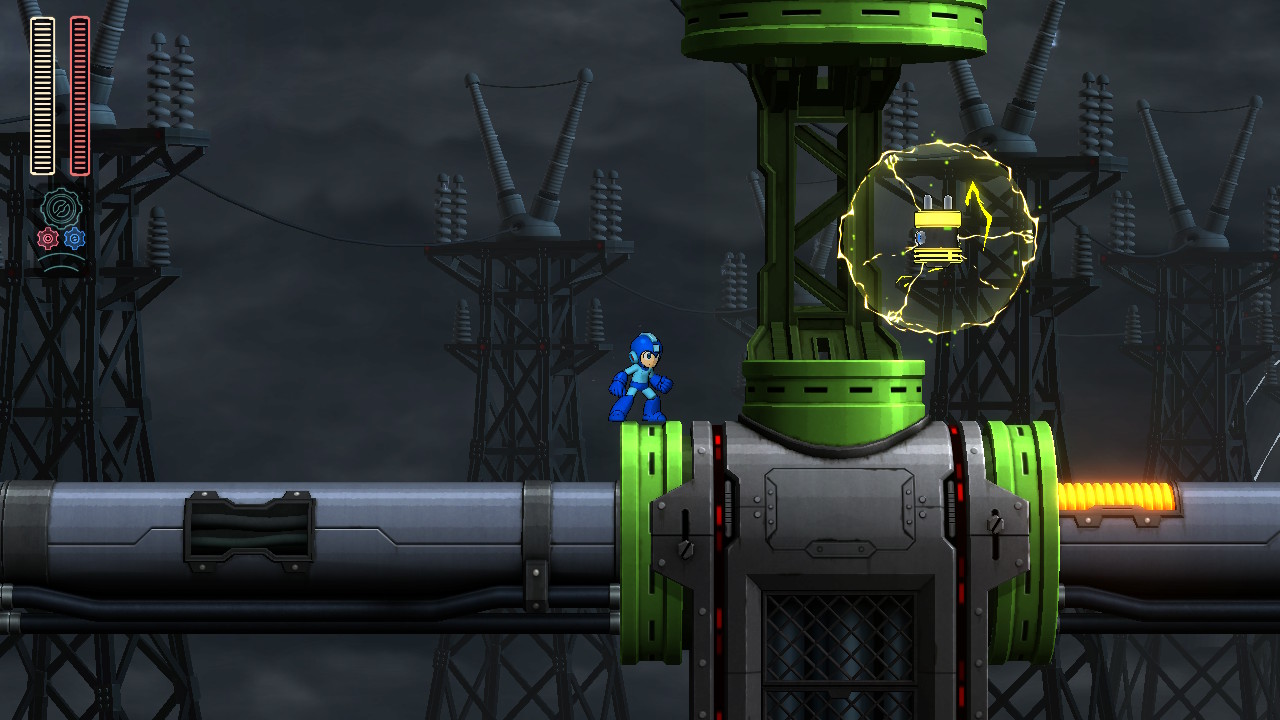
The stormy, gray background contrasts heavily with the electrical, yellow glow, giving the player a clear area to avoid. A single shot is enough to take out an Electriri, and this first one is at just the right height for a quick tap of the jump button.
As an aside, Mega Man 11 (and the Mega Man series in general) features a variable jump height. To reach their maximum height, the player must hold the jump button down briefly; tapping jump will only offer minimal height. Generally speaking, there are not many cases where a short jump is required and a full jump won’t work. However, the variable height offers the player greater control for maneuvering around enemies and lining themselves up for an upcoming challenge.
 A short enough button press is barely enough to get Mega Man's feet off the ground.

The Electriris lying in wait throughout the rest of the room test the player’s understanding of their jump. Immediately past the first ledge is a group of three: one at ground level, one for a short hop, and one for a full jump.
To complicate matters slightly, the path ahead contains a couple of exposed electrical elements, which cause damage on contact. Just like the Electriris’ electrical fields, the exposed coils glow orange, and with only the aforementioned Electriris around, the player has relative safety to learn to work around them. The final new obstacle in the room is a single Batton, which hides above the second ledge.

Battons are entirely black until the player approaches, then fold out bright orange wings once they’re ready to strike. As a black enemy on a dark background, it’s very possible that it could land a surprise hit. All the same, this nasty surprise will imprint itself on the player, leading them to watch the ceilings more carefully.
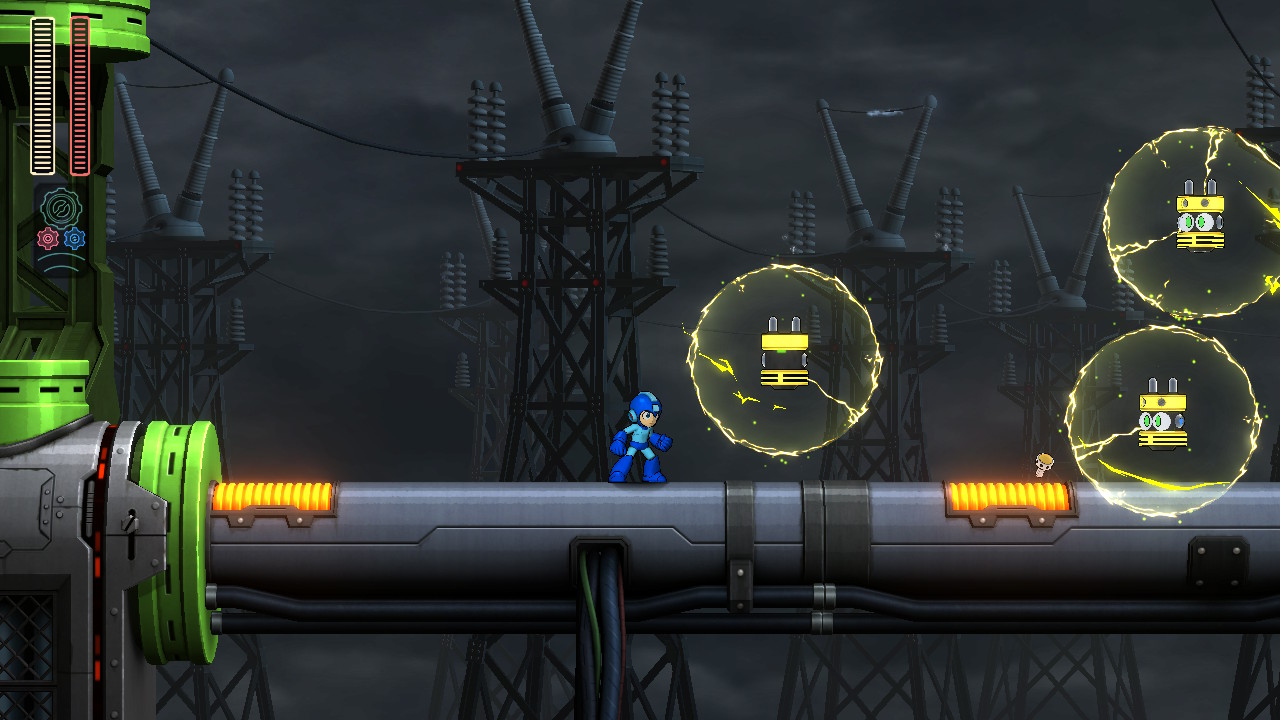
The next room takes them inside and out of the physical storm, but the metaphorical storm is just beginning. Another entourage of Electriris are ready to greet them at the same disparate heights from the room prior. The focal point, however, is a series of moving conduits rolling across the exposed electrical coils. As they are clearly visible from the relative safety of the entrance, the player has ample time to see them focus power into a steady beam of electricity.

Moving through the rest of the room requires them to stay between two slow-moving beams while platforming and taking out Electriris (complete with a couple of cases where a short hop keeps them from hitting the high-voltage ceiling). Somewhat demanding for the second room in the level, but the only consequence for failure is a bit of damage, and it sets the stage for the types of obstacles to come.
Dropping into the next room and taking out another Batton leads into a more complex series of beam-related obstacles. As they approach, the first K-Drone in the level appears, flying towards the player in a sine wave pattern.

The ledge leading into the room makes a good vantage point to avoid it completely, but it also goes down in only a couple of shots, so the player has options.
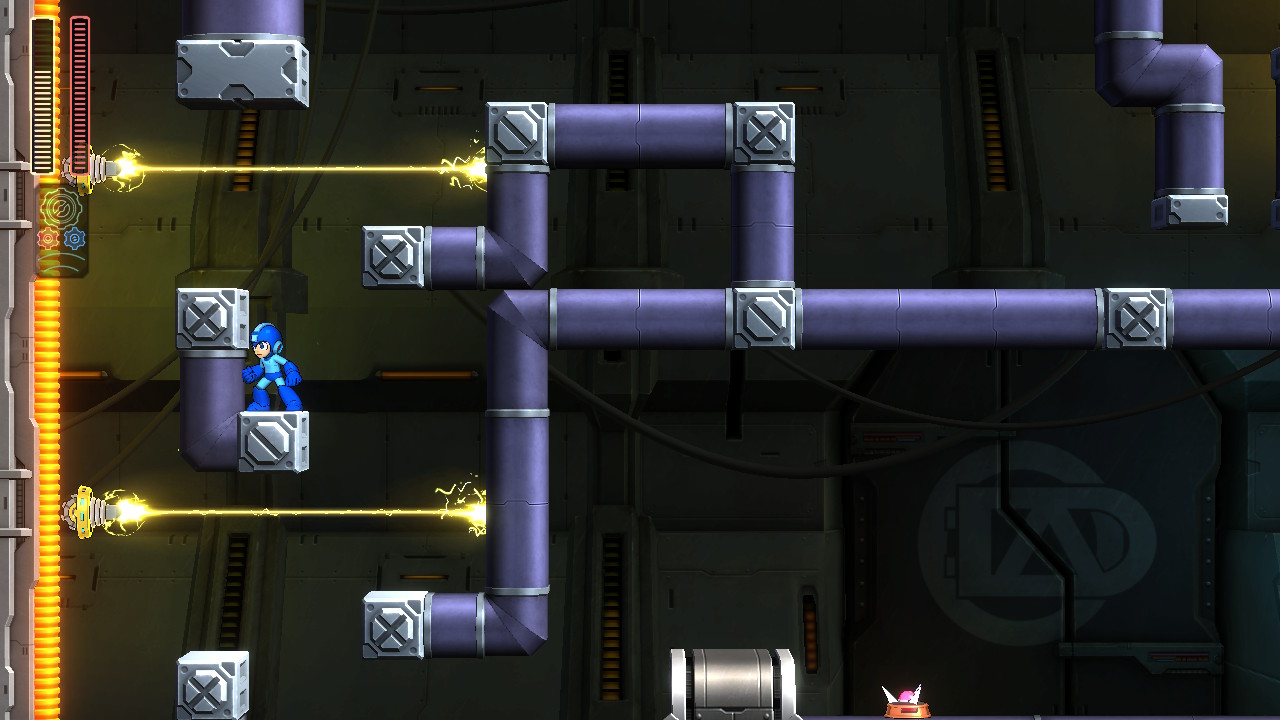
The beams in this room are split into three discrete segments, each of which teaches a new element. First, a conduit rolls out from the wall and up to the ceiling before rolling across. Until the conduit reaches the electrical grill, it doesn’t fire a beam, which the room prior only briefly demonstrated. The second section has a large platform between the beam and the floor, which creates a safe area below; the player now knows that beams do not pierce platforms. Finally—after reinforcing the first lesson by rolling across from the second section to the third—the stage introduces the Elec Crosser, which amplifies the beam in a + pattern when struck. When inactive, its range is visible in faint beams ending in brighter yellow points at the ends, so they don’t catch the player off-guard. As an added bonus, Elec Crossers are the first case where the boss’ weakness, Bounce Ball, has a clear utility; only the Bounce Ball can destroy them.
 The conduits only fire when they have power.


Moving forward presents the player with an interesting obstacle: a Wall Blaster, which—as the name implies—is a wall-mounted cannon. It rotates to one of three angles (roughly 45, 90, and 135 degrees from the wall) and fires a two shot burst at the player.

This first instance carries with it a couple of environmental boons to make it easier to manage. First, the stair-stepping platforms are positioned perfectly for its shots to pass over the player’s head if they stand directly in the corner. Second, this perfect angle also subtly nudges them to use the Bounce Ball again; a single upward attack is enough to take it down.

Past the stairs and further on, there are some jumps surrounded by electrical coils, which act as a less damaging alternative to bottomless pits or spikes. Following that, another Wall Blaster lies in wait with exactly the same weaknesses as the first—even an accompanying Tatepakkan can’t protect it.

The room ends off with a far more dangerous use of K-Drones. Turns out a sine wave flight pattern is a good fit for a vaguely sinusoidal distribution of small platforms. One final Tatepakkan is the last obstacle before the exit.

The fifth room is the first one to be contained on a single screen. Its appearance is intimidating at a first glance: a trio of rolling conduits activate a web of Elec Crossers (and their X-shaped counterpart, Elec Xtenders) in a three-round burst every few seconds. To move forward, the player must navigate up and around this electrical web. A K-Drone lies in wait when they reach the second of three platforms to escape, and its pattern is spaced perfectly to knock the player off of any of the three.

The difficulty can be trivialized, however, by yet another use of the Bounce Ball, the ricocheting shots of which are likely to take out a few of the obstacles per use. Whether by destruction or precision, the player has options to reach the next room.
The next room is a staircase with the first checkpoint. The room to follow, however, has a little bit more to talk about. Right as they enter, the player is greeted by a Tatepakkan on a ledge.

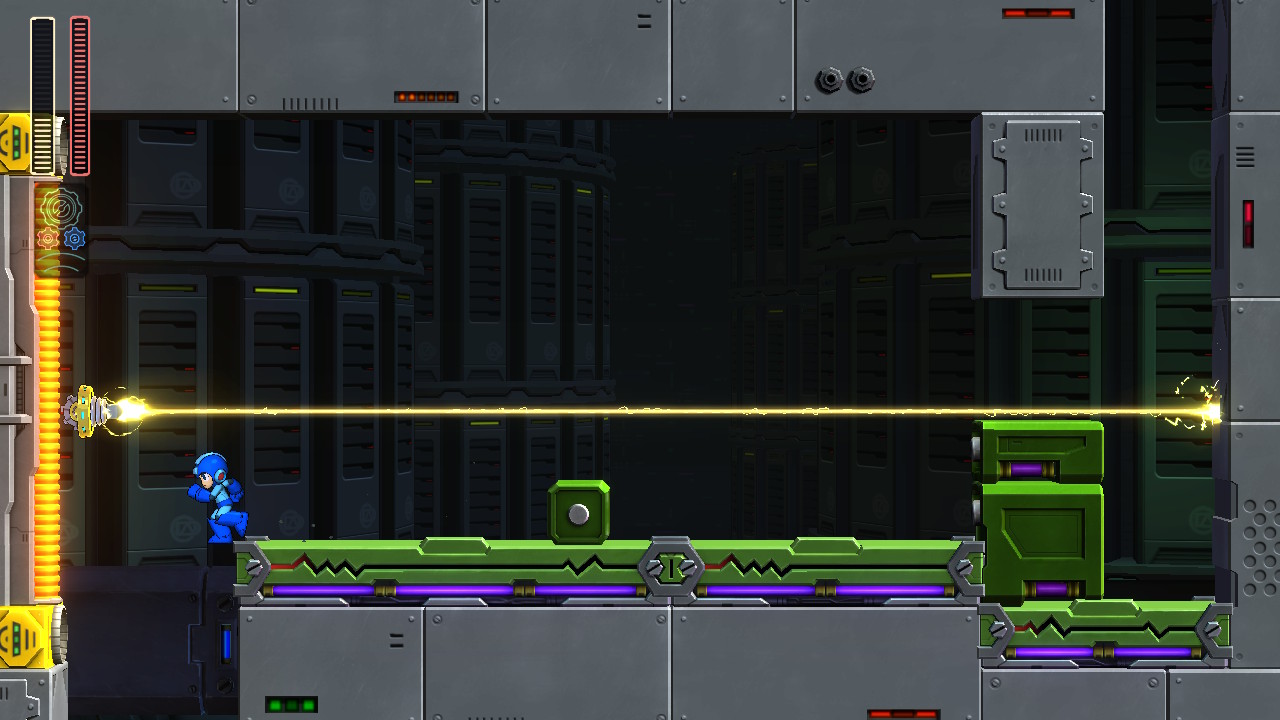
The shielded cannon is an obstacle in its own right, but it also serves to slow the player down so they can see what’s coming next: a conduit firing a vertical beam they must use the terrain to avoid. Especially for a new player, the Tatepakkan is likely to take a couple cycles of the conduit to defeat, so they will have seen exactly how the obstacle works multiple times before they can reach it. Notably, this is the first time that a beam moves against the player, so cover is more important than ever. A couple of Electriris gatekeep the next obstacle, this time a descending, horizontal beam.

A well-timed Speed Gear can get them through more easily, but the player is likely to need the pit of safety partway through. Another pair of Electriris make the pit slightly less safe, but they can both be taken out without jumping into the descending beam.
Climbing a ladder leads to a more open hallway with a couple of separated Gabyoalls and several waves of Electriris.

This combination forces the player to move quickly and accurately; while the Electriris are slow, there are several of them at once, and the Gabyoalls accelerate substantially when they’re on the same level as the player. Abandoning the simple ladder, the ascent at the end of this hall requires the player to climb carefully and deliberately to avoid being hit by a regular series of descending beams.
The room’s final obstacle is a much more rapid series of vertical beams poking through a low ceiling. They’re timed around obstacles to fire in waves, so the player must slide with good timing to ride through in a blind spot.

The next area’s setup looks familiar, but there’s one key difference: the stairs no longer protect the player from the Wall Blaster’s shots.

At the same time, the vertical passage leading to an inaccessible hallway is perfectly structured so a Bounce Ball attack will rebound up and across to destroy the Wall Blaster. With it taken care of, the only remaining threat is another Tatepakkan unfortunately positioned on the edge of a step, making it a relatively easy target.
Through the gate lies the stage’s midboss: Dread Spark. This jammin’ jumble of cables and machinery has a mostly green, black, and purple color scheme, which makes the bright red sunglasses an eye-catching weak point. The ceiling of its arena is covered in stationary conduits, which periodically activate throughout the fight.

However, each time this happens, the beam is preceded by a fainter beam similar to the Elec Crossers before. Dread Spark has a rather simple pattern using these beams: first, they activate in pairs moving from left to right, then right to left, stopping before the last pair each time. Next, they activate in three more variable sets, the last of which leads the player into the middle.

During this phase, Dread Spark spits out small enemies which move in a sine wave pattern, so the player isn’t safe just moving back and forth. Once the player is in the middle of the room, it summons a pair of Elec Crossers to box them in, then activates a beam at their position about once per second.

On repeat cycles, the Elec Crossers get closer together, leaving the player less room to maneuver. As with Frog Balloon before, Dread Spark is weak to the same weapon as the stage boss: Bounce Ball.

The room to follow is a breather after the midboss. It contains the second checkpoint of the stage, along with some life and weapon energy for a weary player. The only way to proceed is down, and the static camera and lack of any other way to proceed make clear that this way is safe. The drop leads to a simple, open room with a single descending beam. The entrance is a safe vantage point to watch the beam’s pattern, but they can’t just book it to the exit. A single bump in the path forces them to jump, tightening the timing they need to make it past without damage.
We’ve come quite a ways without a major synthesis room, but that’s about to change. From the start, a pair of Battons lie in wait for the player to reach the ledge to the serpentine hallway above.

This does put them closer to the player when they attack, but it also gives the player more room to dodge and strike back. Continuing onward, a couple of jumps over electrical coils lead to another web of Elec Crossers and Elec Xtenders, this time ensnaring some of the platforms to progress in the danger zone.

They can be either destroyed or avoided, whereupon a single Electriri forecasts the final part of the room. A ladder leads down into a hallway of scattered Electriris, one of which is too low to hit with a normal attack. Once more, the player has options: they could use a charged attack or a special weapon to hit it, or they could destroy those surrounding it and simply jump over. Whichever way they choose, fighting through the storm allows them to escape.

This respite is short lived, however, as the next, wide-open room contains a new threat. An intimidating Press Don rockets slowly into the air towards the player, crashing to the ground when their fuel runs out—or the player tries to pass underneath.

Gravity kicks in too quickly for the player to make it under unless the foe is almost at its full height, but it can be defeated with enough attacks. If they do manage to pass under it, it can’t reach the upper ledge, providing a safe place to either attack or escape.
The beam obstacles reach their natural conclusion in the room ahead as conduits from three sides weave a matrix of danger. These occur in three discrete ascents with nearly identical terrain—the first features Electriris to keep the player on their toes, the second is a breather, and the third throws a K-Drone at them if they don’t move quickly enough.

Additionally, a daring player can duck into the base of the third set to snag an E-Tank, though escaping can be a challenge.
Overcoming these three obstacles leads to one final challenge: a pair of conduits moving up and to the right, leading the player through two jumps to the end without any cover. The horizontal beam makes this particularly tricky, as it cuts right across the top of both platforms, but there’s a couple of seconds each cycle where the jumps can be made safely.

That said, the entryway is safe as usual, so they can take as much time as they need to get the timing down. Navigating to the other side safely rewards the player with the pre-boss corridor and the final checkpoint of the stage.
Fuse Man’s very entrance introduces his primary form of movement: practically teleporting around the arena in quick bursts of electricity. As soon as the battle begins, he sets electric spheres roving around the wire-like tracks in the background. The active path for these obstacles is more brightly lit than the inactive tracks, so it’s clear at a glance where the danger is. While he stands still during the attack, he also cloaks himself in a field to block the player’s attacks. His primary tactic is zapping around the room, stopping for a moment to hurl a bolt at the player, then zapping away again. His destination is telegraphed by a bolt of blue lighting, and running into him while he moves will hurt the player. When he reaches half health, he activates Speed Gear. He moves to the center of the room and draws in the circling spheres, then rapidly zaps back and forth to the top of the room and slams down to hit the player. He repeats this several times, then summons the spheres again in a different movement pattern. At this point, his basic movement is faster and he hurls two bolts every time he stops, but his strategy is otherwise unaltered.
 The one electrical element in the stage that isn't allergic to rubber.


None of the player’s abilities interrupt his pattern—a charged attack simply does more damage, as does his weakness. However, the ricocheting spread shot of the Bounce Ball makes it an ideal weapon for chasing him down, and it destroys his thrown bolt projectiles on contact. While Fuse Man is a speedy opponent, every one of his movements has a moment’s notice prior, so the player has time to react accordingly. As with all timing-based challenges in Mega Man 11, the window of opportunity becomes wider should they utilize the Speed Gear ability, but it is never outright required to avoid taking damage.

Defeating Fuse Man grants the player his Scramble Thunder weapon. It fires downward by default, but can be aimed upward as well. When the attack makes contact with a surface, it splits into two spherical fields of electricity which move along the surface in opposite directions. On colliding with an enemy, the sphere bursts into a larger field, which stays in place for around two seconds and damages anything that touches it. Power Gear increases the size of the initial attack to match the final burst of the normal version, and the projectile continues moving instead of stopping when it hits an enemy. Because of its clinging capabilities, Scramble Thunder is particularly well-suited for enemies on walls or ceilings, and it has no problem taking down foes such as Wall Blasters which stay rooted in place.
With that said, we’ve reached the end of another leg of the journey! The stages in Mega Man 11 are lengthy and densely packed with noteworthy challenges, so these posts are trending towards the lengthier side. I appreciate a bit of patience as I take the time to write them well! Stay tuned for the next stage in the near future, where we’ll see the Scramble Thunder in action!